3 Formulas for a Fool-proof Outfit

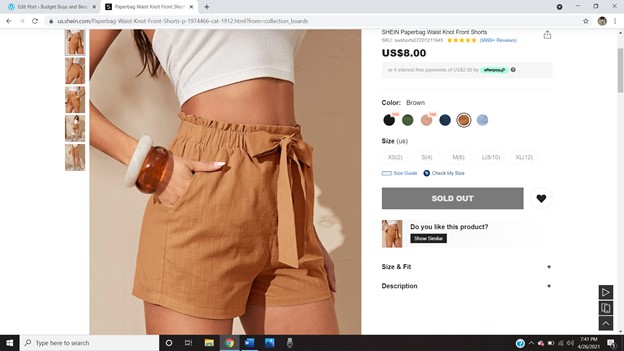
Sometimes the problem is that we just don’t know where to begin. We have all the right components but consistently resort to rotating through the same 10 outfits that we know looks nice and makes us feel good. Instead of doing this every time it comes to getting ready in the morning, use one of the three formulas below for constructing an outfit that is comfortable and makes you feel confident every time!

#1 Start with the Basics

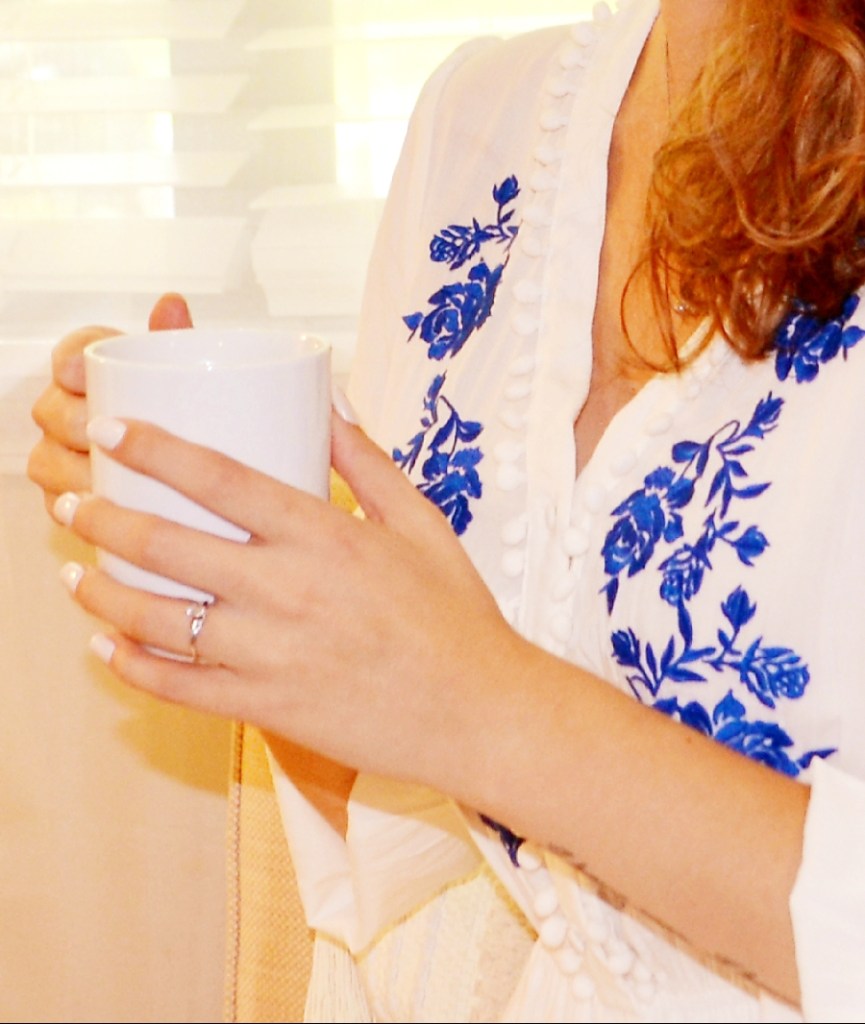
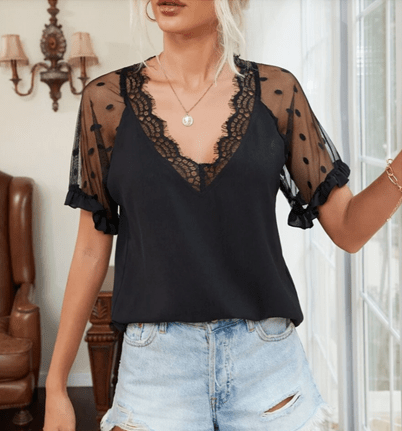
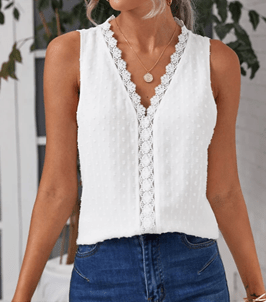
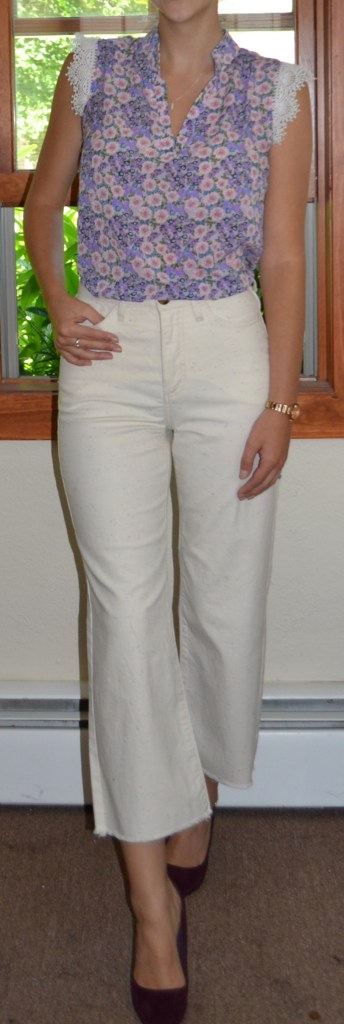
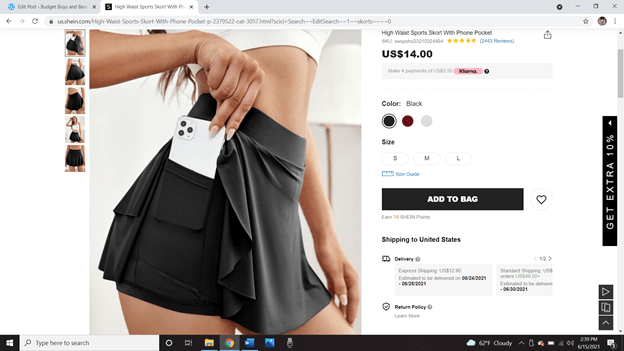
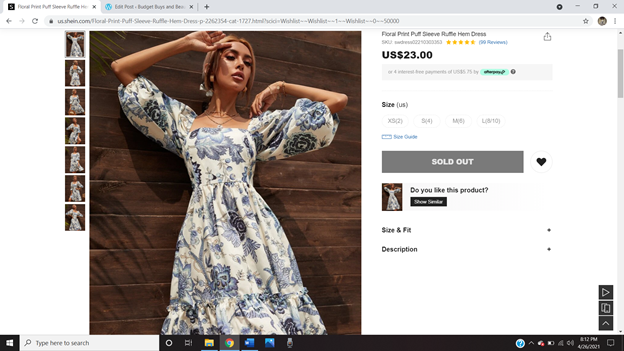
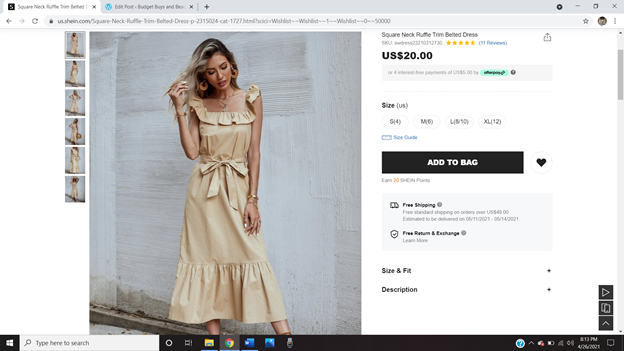
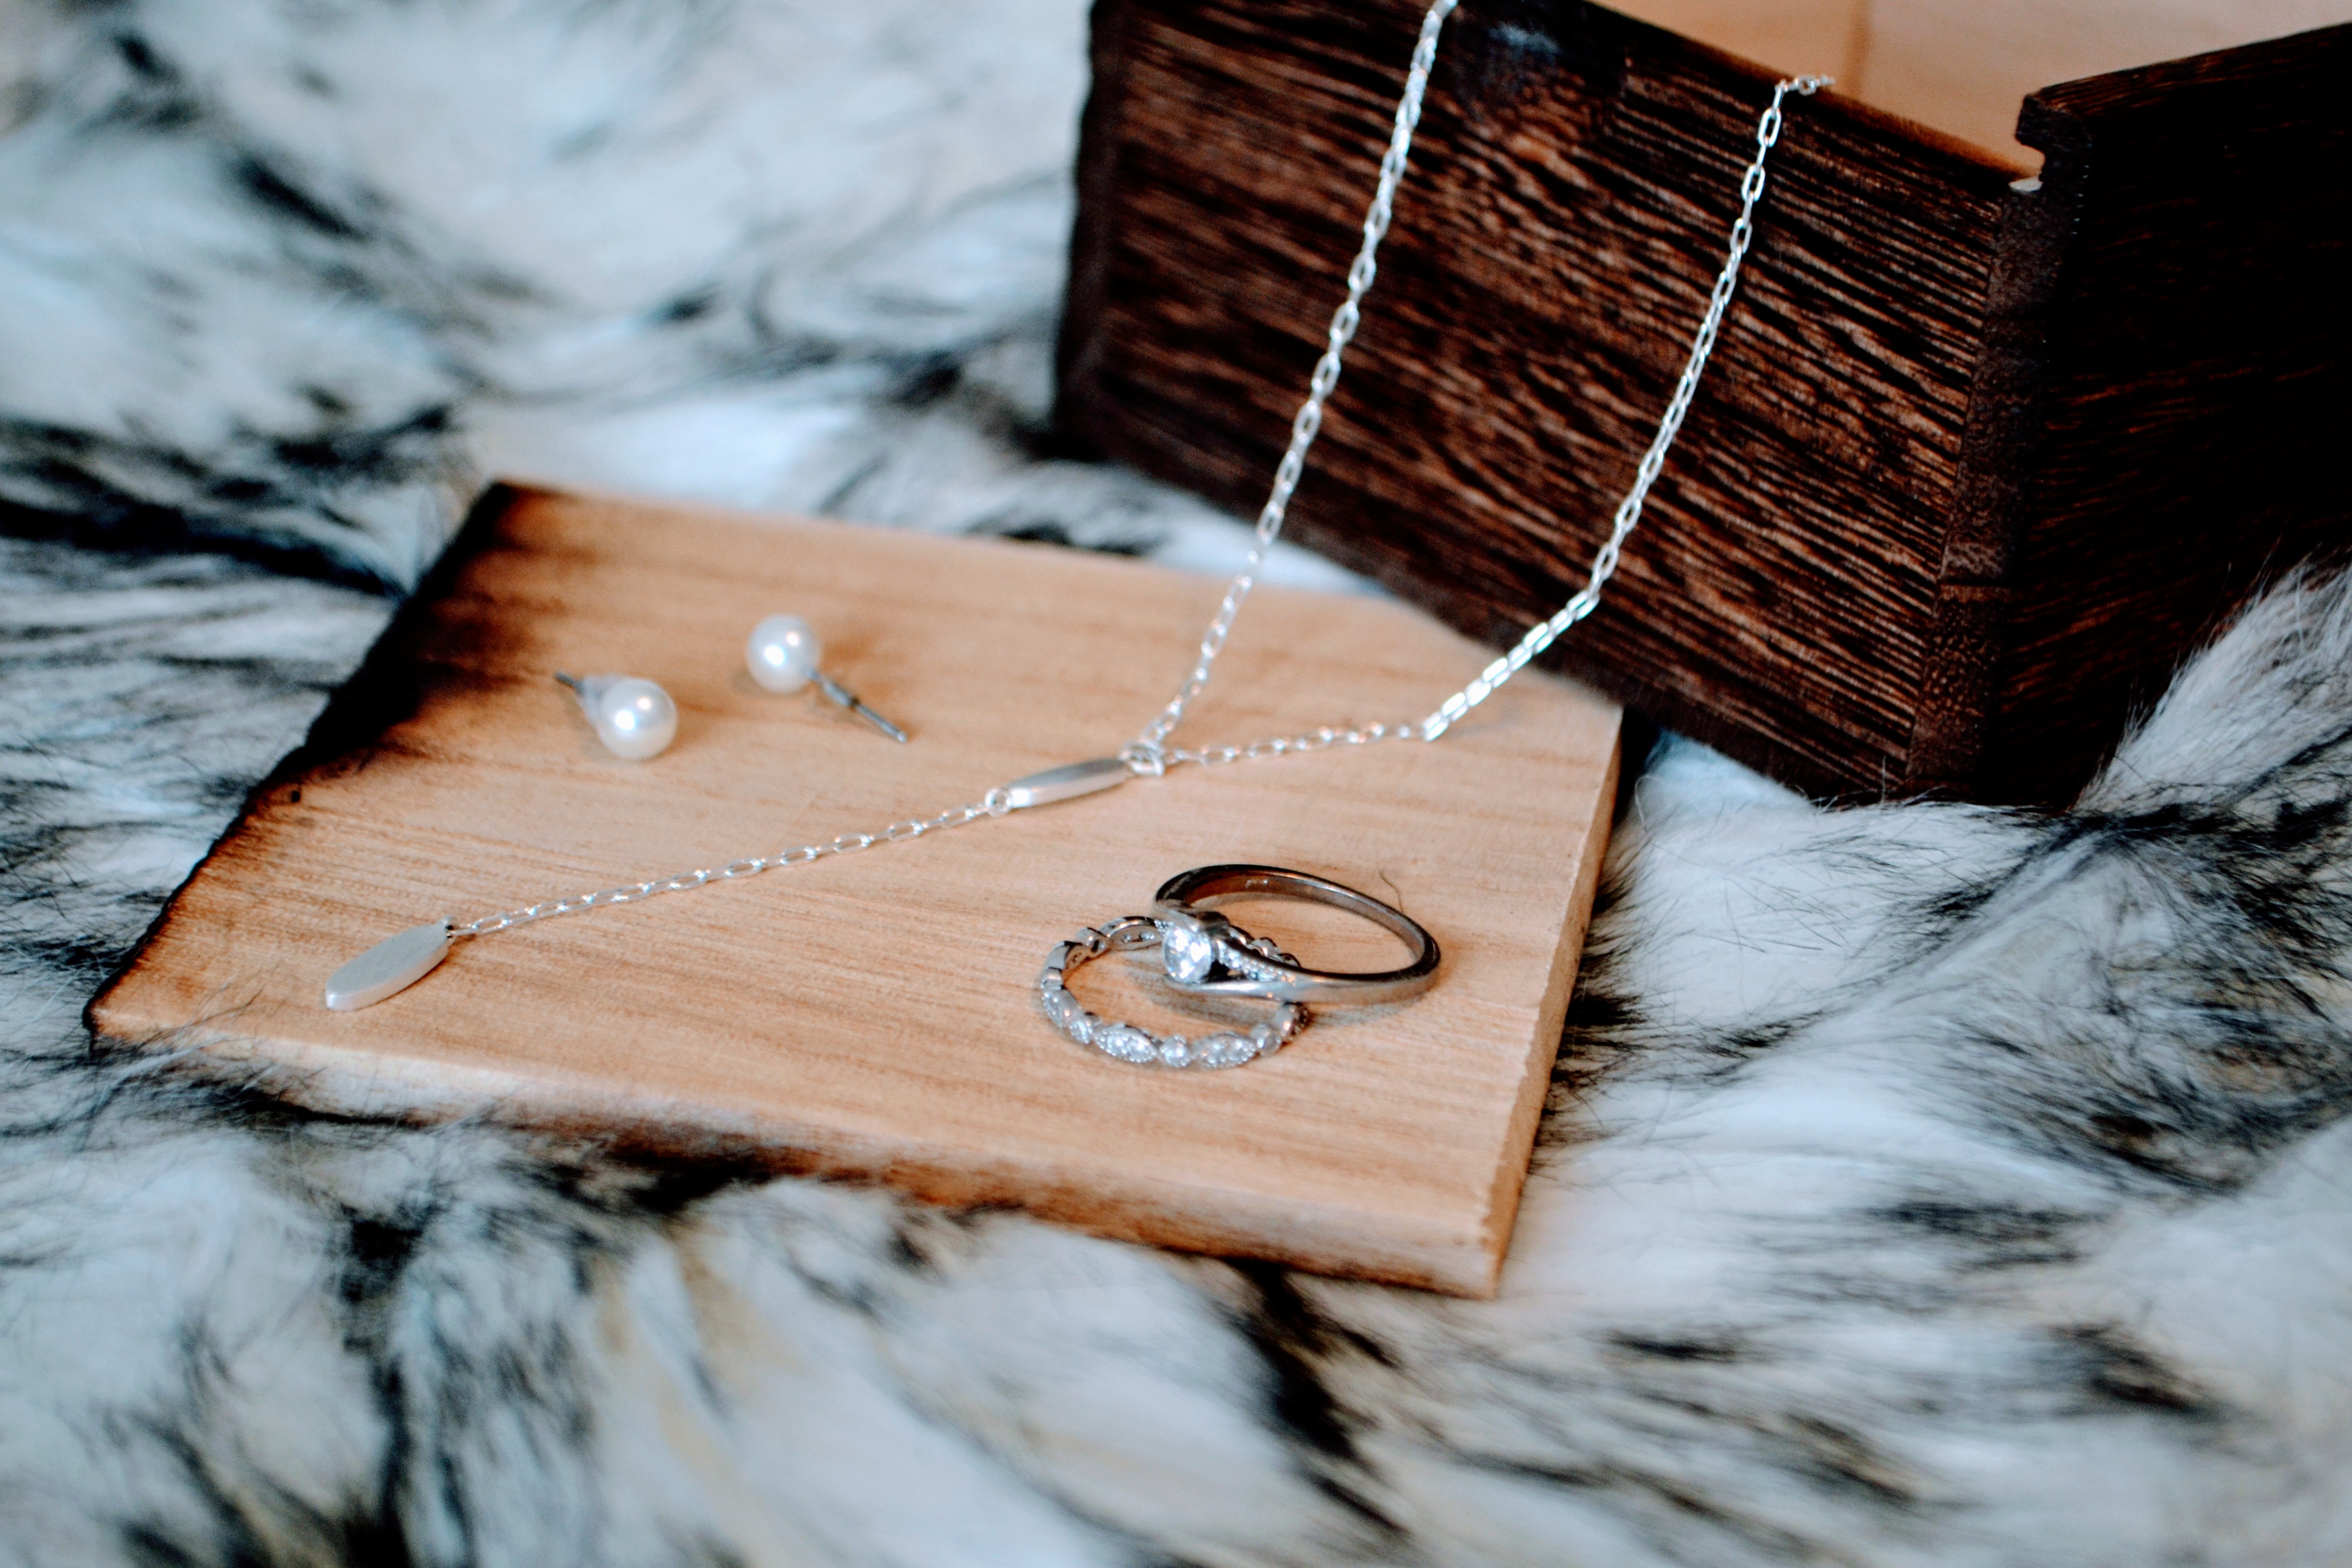
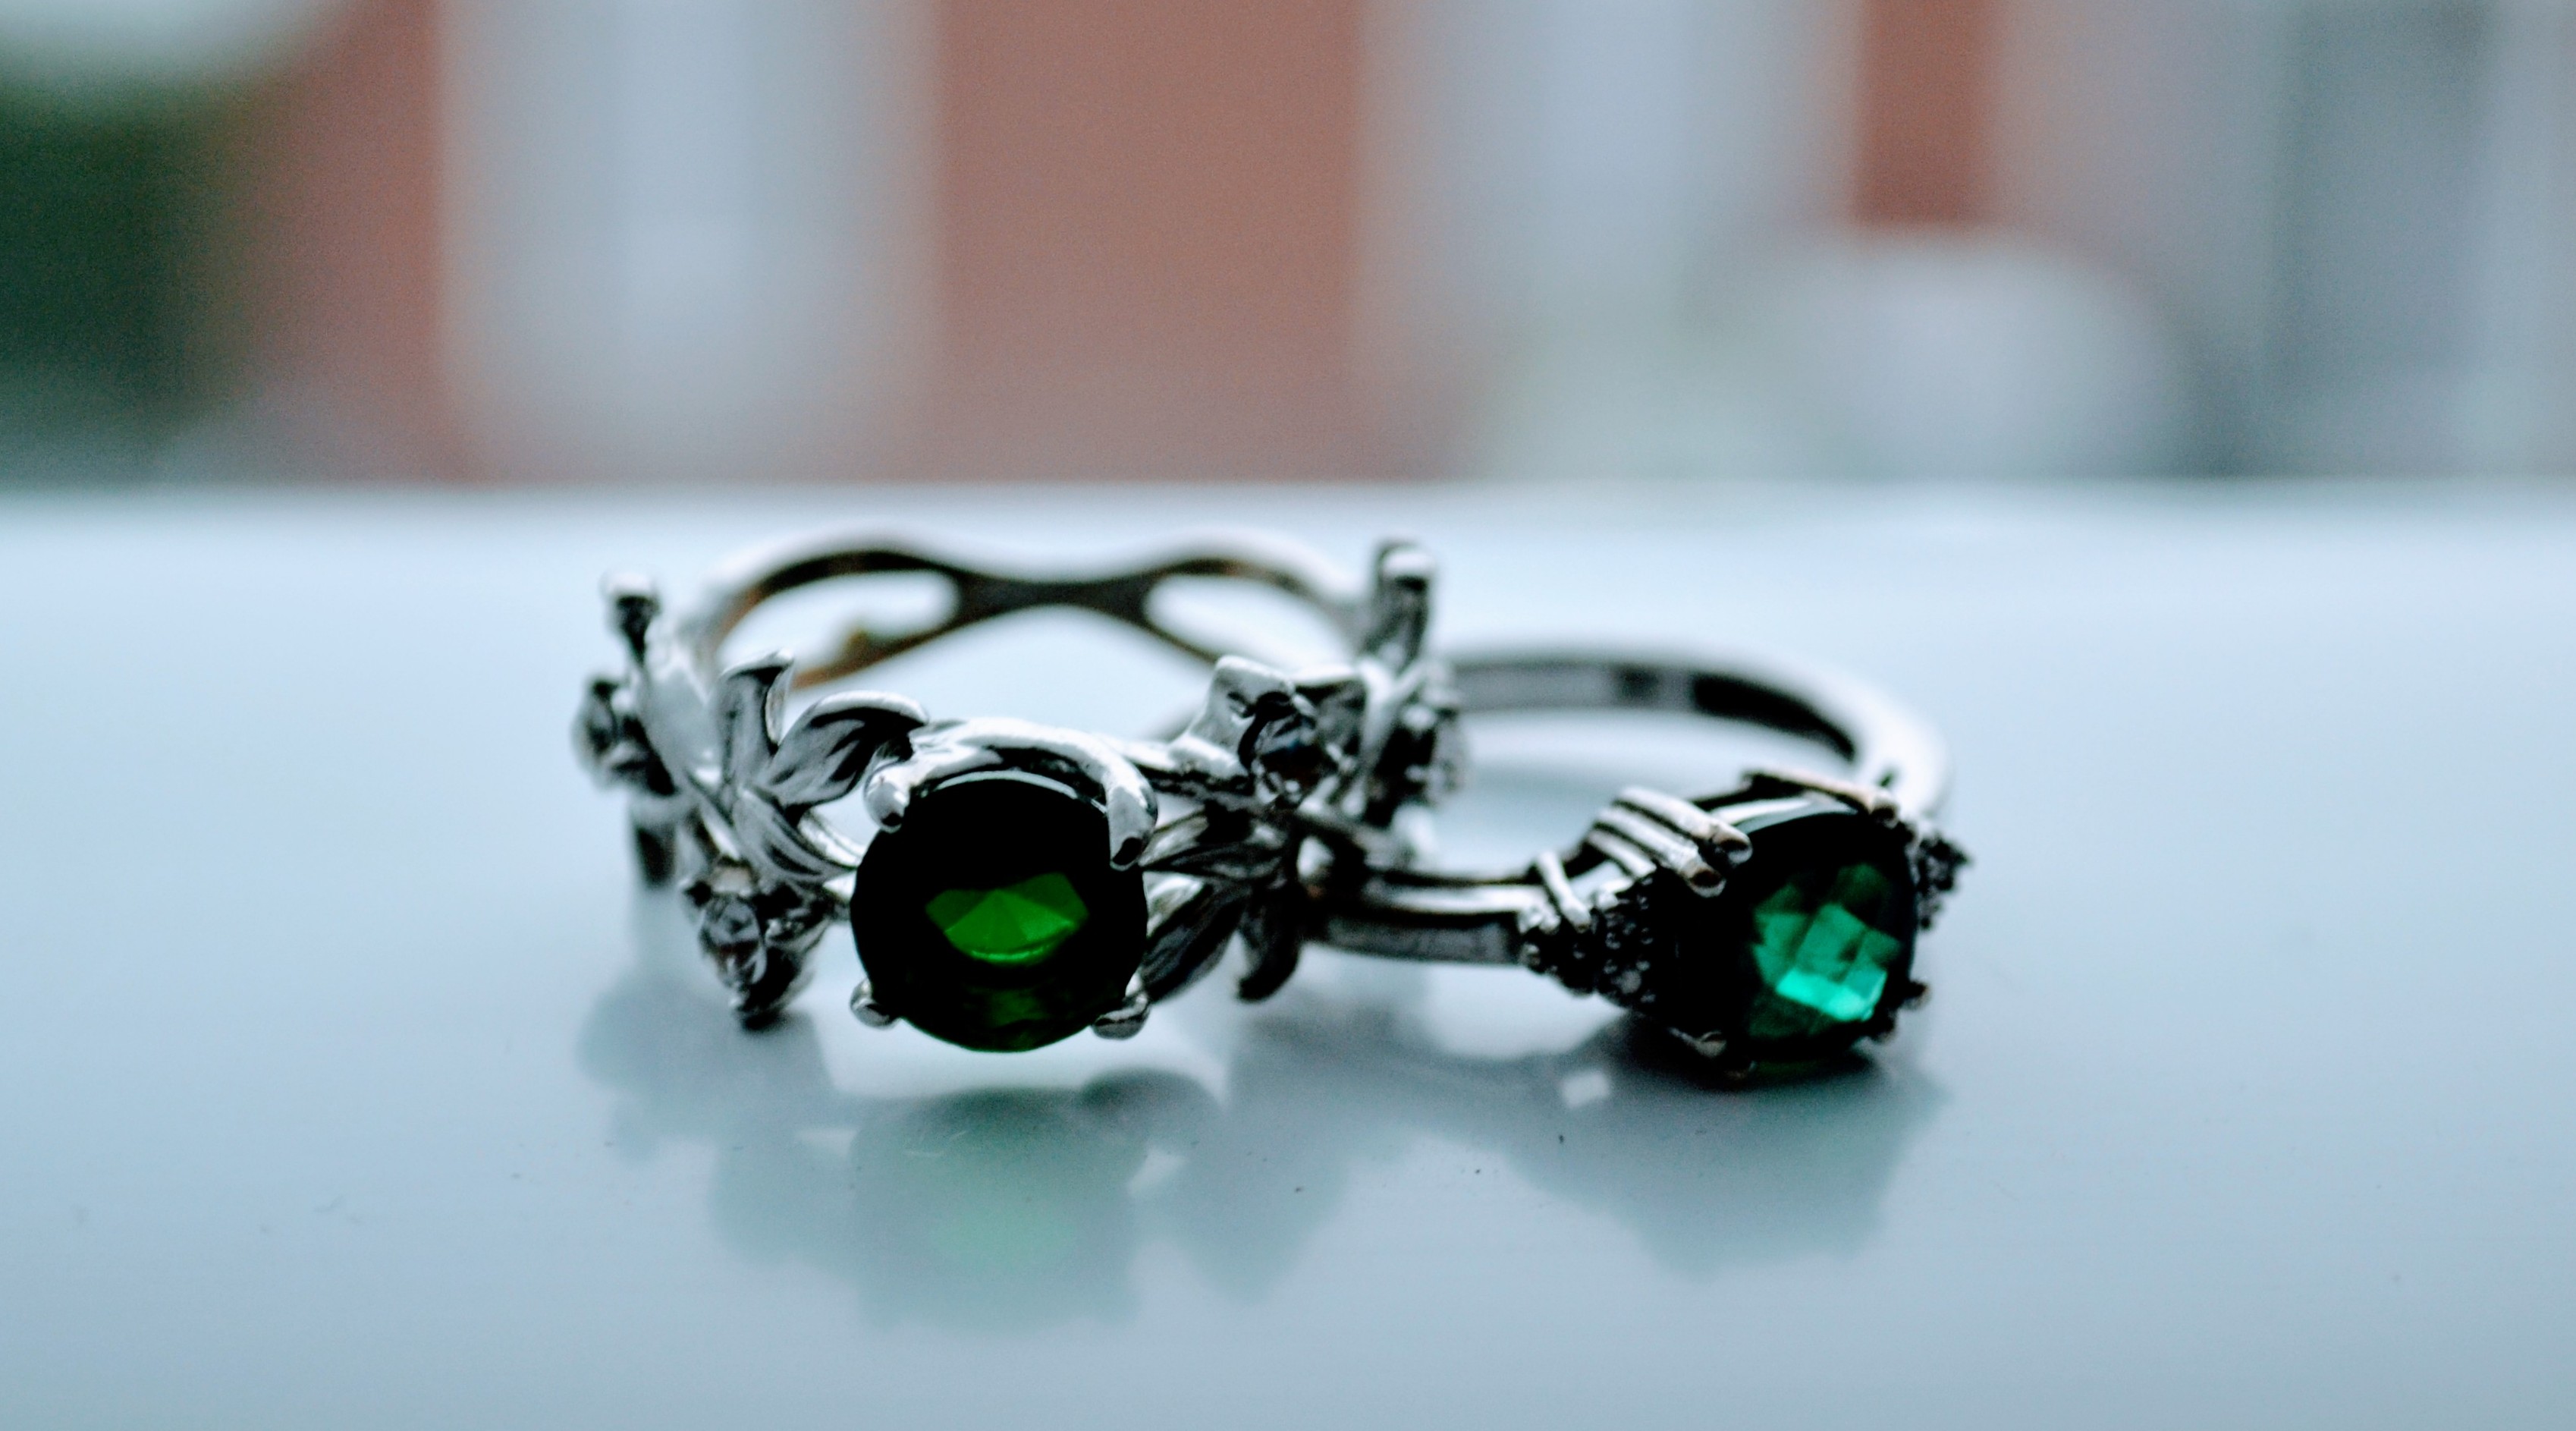
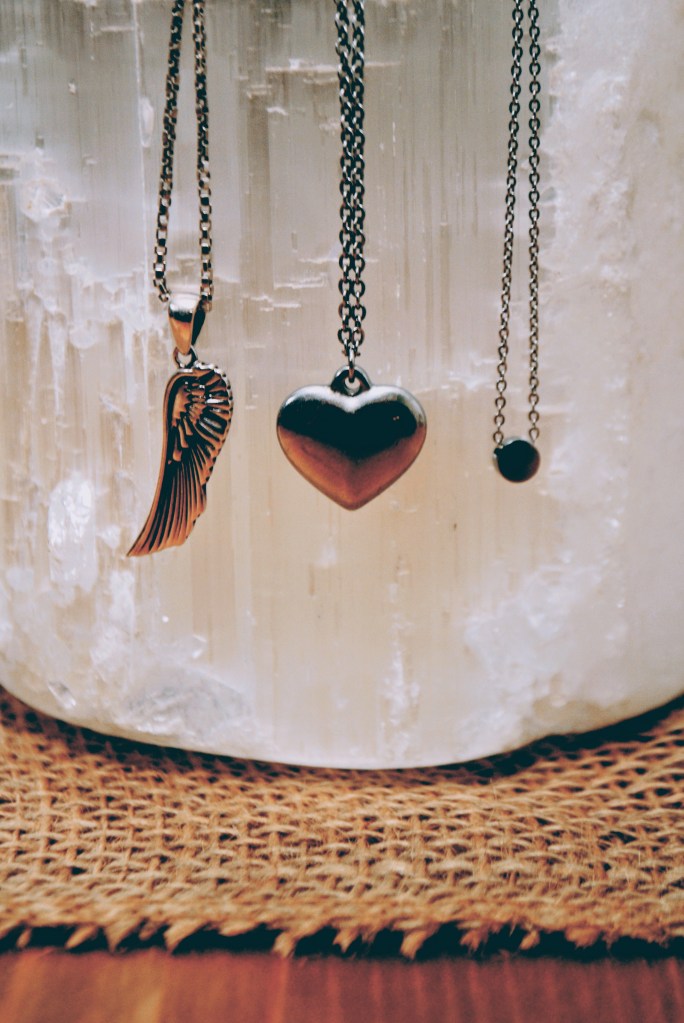
In my opinion, this is the easiest way to construct a great outfit. Begin by grabbing a basic shirt (if you are not sure what a “basic” is, click the button below to read “Wardrobe Essentials: Foundational Basics”). Once you have found the correct shirt that suits the occasion, move to the bottoms. Make sure you vary the textures of the items, for example if you reached for a cable knit sweater, reach for a satin bottom. By varying the textures your outfit will not only look more visually appealing, but more luxurious and expensive as well. Once the core of your outfit has been established, you can begin to layer. In the example I used above, you have your sweater and skirt, then you may choose to add a trench coat over top depending on the weather and occasion. Never forget your accessories! A touch of jewelry, some sunglasses, shoes and a handbag go a long way in contributing to a more put together look. Some of the most basic outfits like a tee shirt and jeans can become instantly more elevated just by layering some necklaces and slinging a bag over your shoulder. How easy was that?!

#2 Pick a Statement Piece

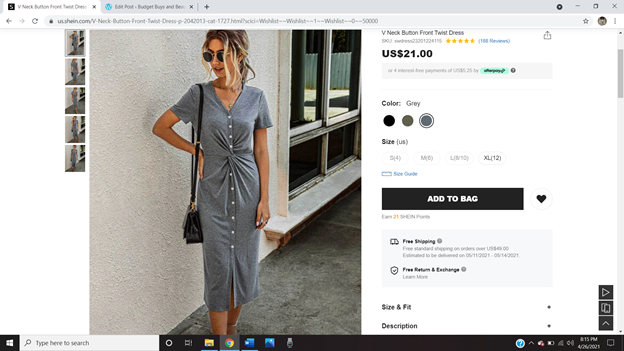
This way to build and outfit is almost the opposite of the first technique. This time, begin with your statement piece. This could be something like a thick, bold chain link necklace, a printed top or a pair of vibrant heels. Whatever you choose, this item should not be considered a basic. Once your piece is chosen, you want to begin to fill in the gaps as it were. Let our example for a statement piece be a printed top. Next, add a basic pair of bottoms (bonus points if the texture varies from the statement piece). The items that you will be adding to the outfit should allow the statement piece to remain just that, a statement that stands out from the rest of the items in the outfit. Each article of clothing that is added is simply playing a supporting role to the statement piece.

#3 Find Inspiration

When I am struggling with coming up with fun new outfits to wear I like to resort to social media inspiration. There are some fashion YouTube channels that focus on “shopping your closet” or essentially, using the items that you already own and repurposing them into outfits in new ways. There are ways to use inspiration from YouTube, magazines, Instagram and my favorite — Pinterest, that don’t require you to go out and purchase a whole new wardrobe. I encourage you to do the following when attempting to recreate an inspired look:

  • Explore the themes of the outfit
  • Think of similar color combinations
  • Determine what textures you see
  • Identify the structures and cuts

To explore the themes of the outfit You can examine the overall tone that is conveyed through the outfit. Is it an relaxed style? A trendy one? Does it give off punk vibes? Does it look expensive? Minimalist? These are some themes to consider prior to constructing your own outfit based on your inspiration.

Color combinations are simple. When you find inspiration you can consider the literal colors that you see represented in the outfit. Alternatively, if these colors don’t yet exist in your own wardrobe, examine if the shades/tints/tones you are seeing are light or dark. What kind of combination of light or dark are you seeing? Can you recreate the contrast (or lack of contrast) of shades that you see in the outfit using items from your own wardrobe? Is the outfit monochrome? It’s also okay to mix up and play with varying shades and colors to achieve a look inspired by the image you find, it doesn’t have to be the same.

What textures did you spot in your inspiration outfit? Was the top made from a silky fabric and the bottoms from a suede? Even if you don’t have items in your wardrobe that are the same colors as the ones from your inspiration, you can recreate the outfit using similar textures and fabrics in different shades or colors entirely. Don’t have any silk or satin tops? That’s okay too, opt for a different material that can still reflect light similarly to the silk like a faux leather. Or, if the reflection isn’t what you are after, search for a top with light, soft, flowy fabric just like satin or silk.

The final idea is to find items in your closet that are shaped or structured in a similar way. If the bottoms were A-line, see if you can find a skirt in your closet with an A-line shape. Similarly, you could find a dress that does the same and you have the option of layering over top of it. However, your bottoms do not have to be in the same category as what you see in your image. While the inspiration outfit may include a skirt, you could opt for a pair of flare jeans that provide that same A-line cut.

Taking a Look at Some Inspiration Examples

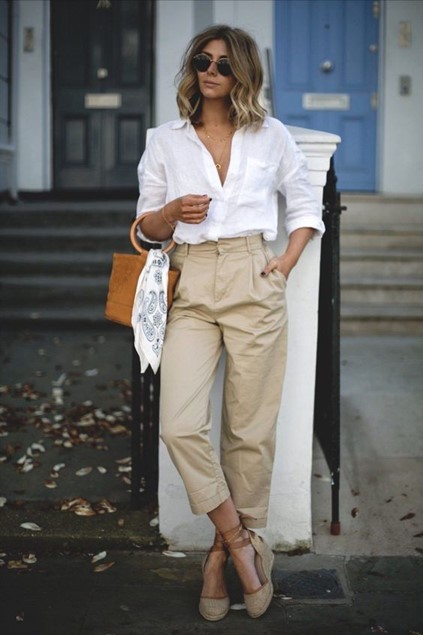
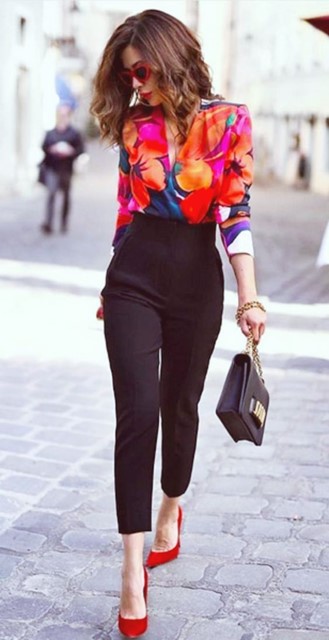
Below are various examples of images I gathered from Pinterest (the first larger image) and how I was able to recreate them using items from my own wardrobe alone (the smaller images down below).

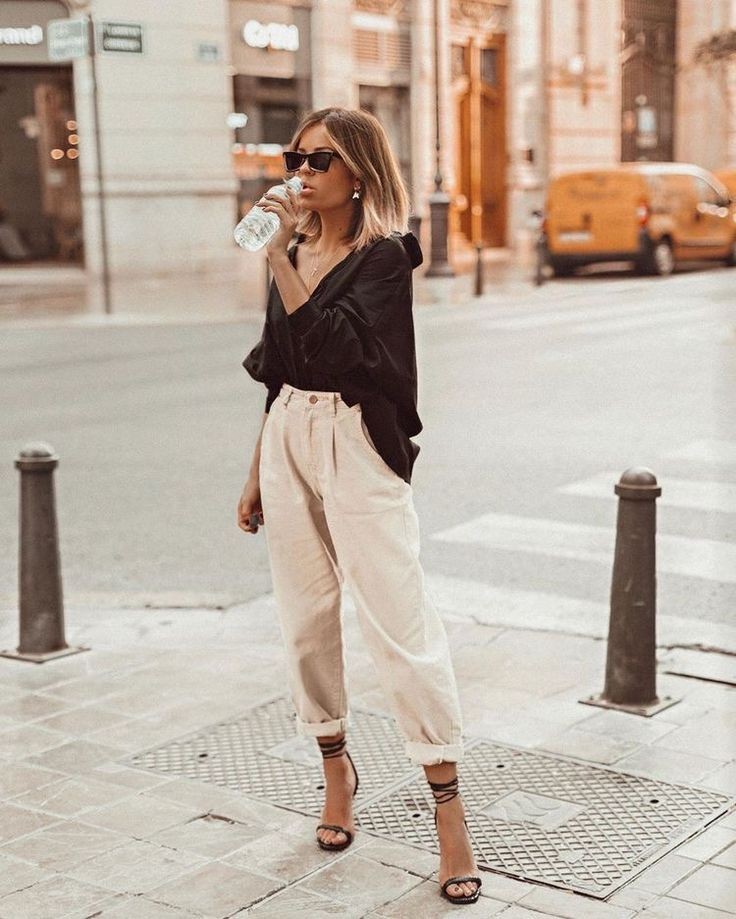
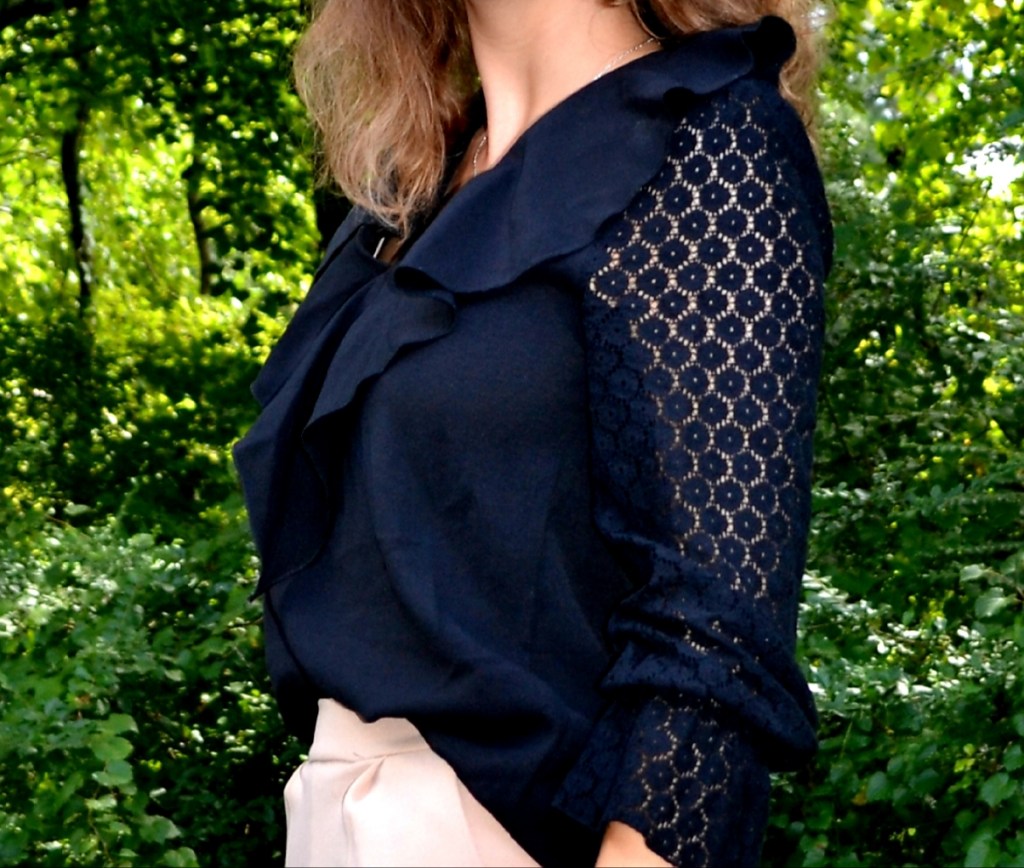
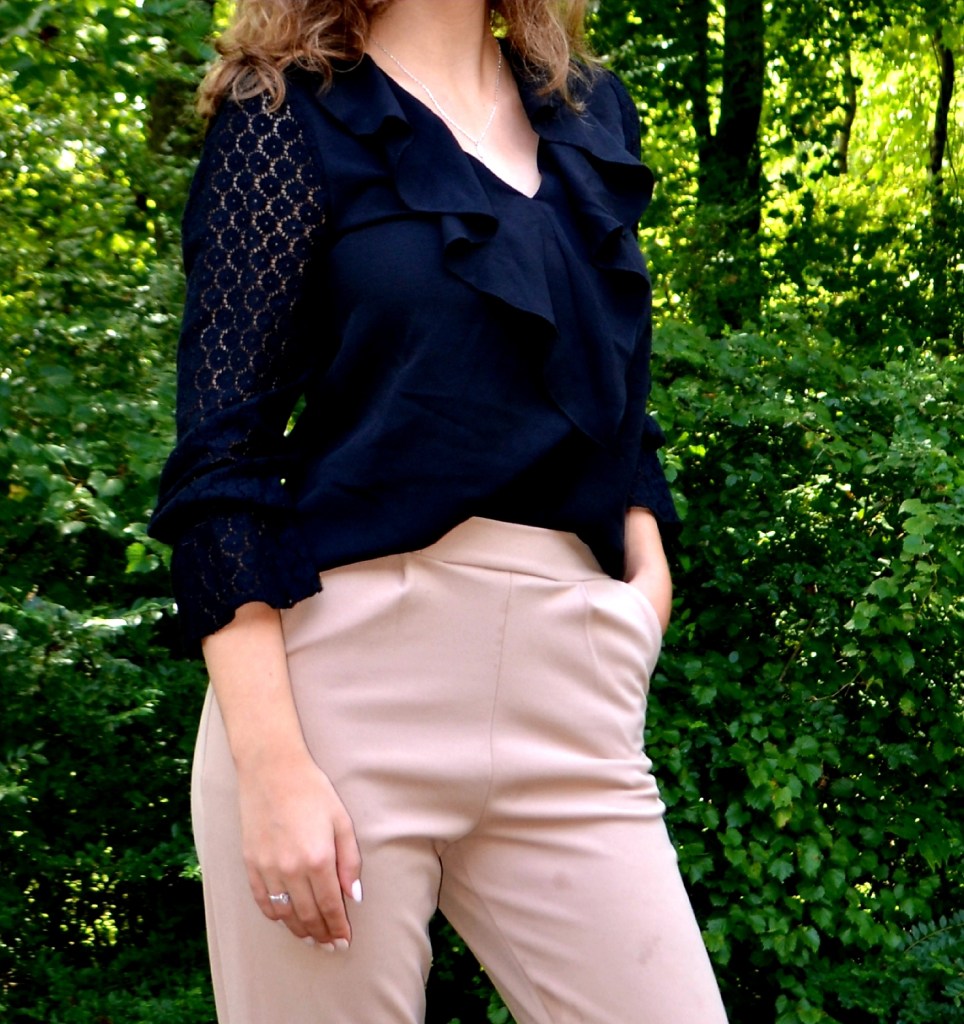
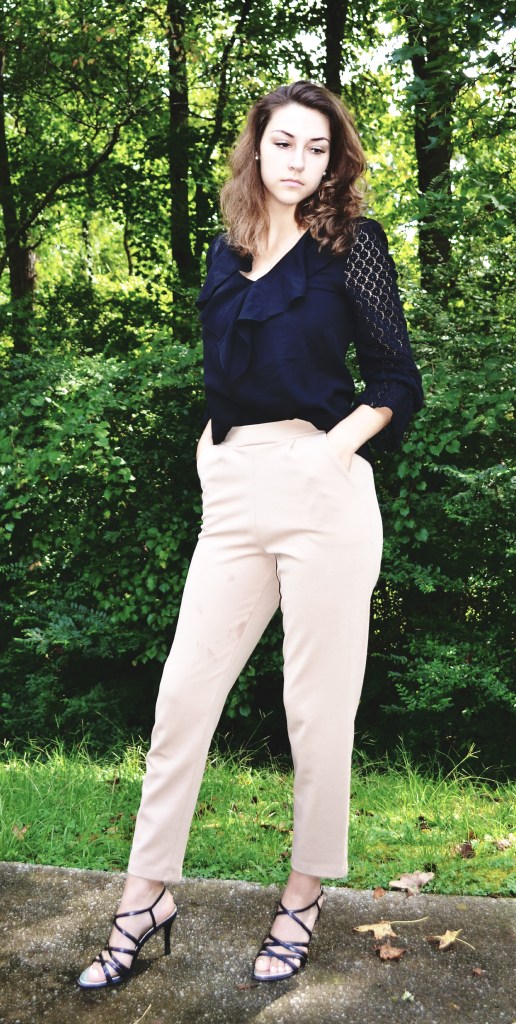
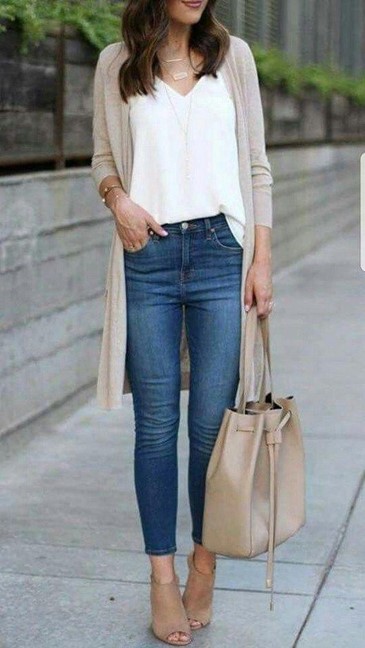
I decided to use the inspiration of color and theme in my outfit recreation. I copied the colors as similarly as I could using existing items in my wardrobe. The themes I drew from the inspiration image was loose fitting, relaxed clothing. The top is loose and free which is especially seen in the ruffled collar detail. I chose to only tuck in the front of the shirt, just like in the image from Pinterest. The pants are fitted in the waist and relaxed in the leg just like in the image. I did my best to mimic the jewelry as well. She has on some dainty layered chains. Instead of layering necklaces, I decided to wear my dangly silver one which mimics a similar aesthetic. I paired some strappy black heels with this outfit, and voila! My outfit recreation is complete!

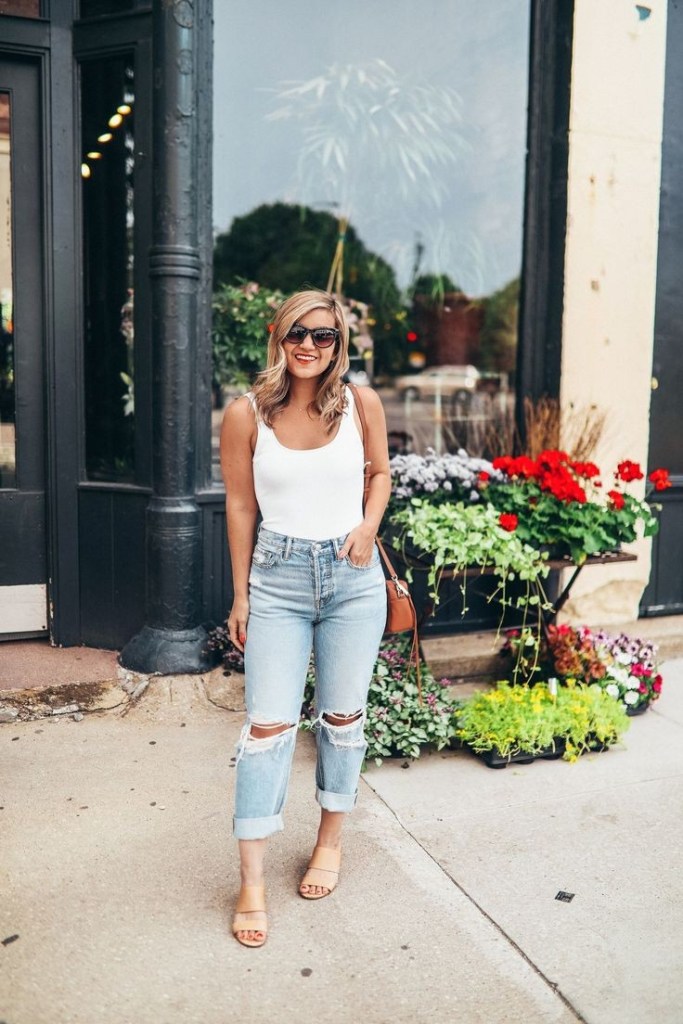
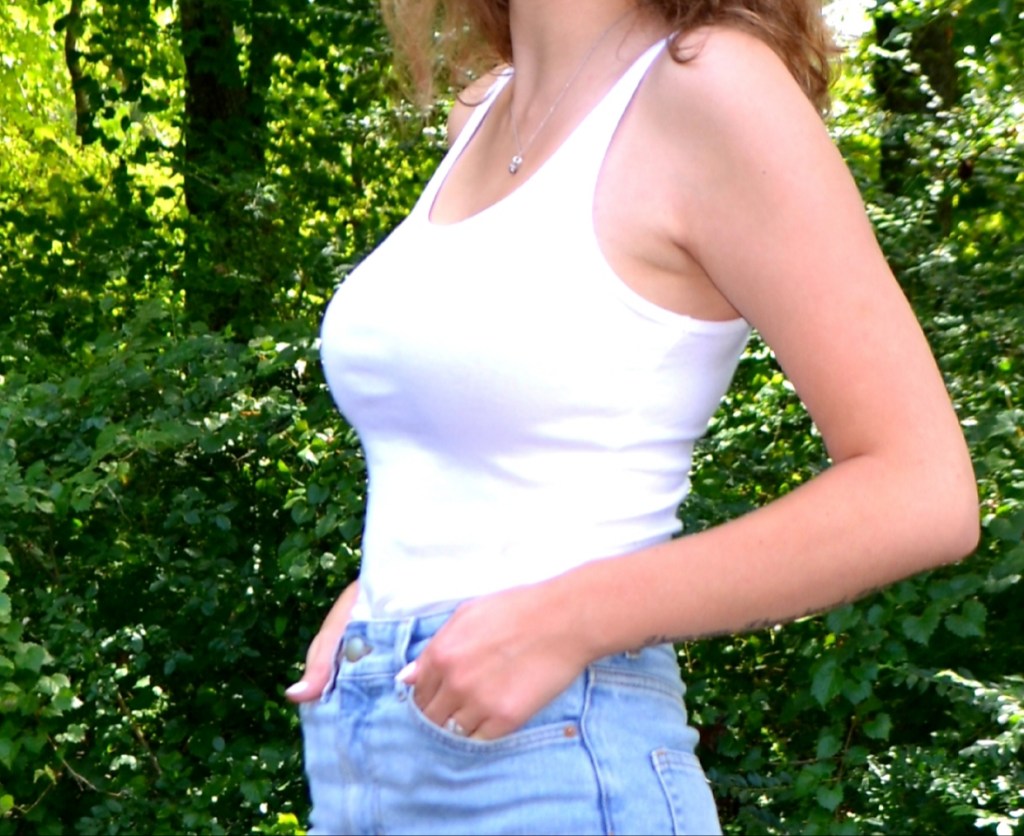
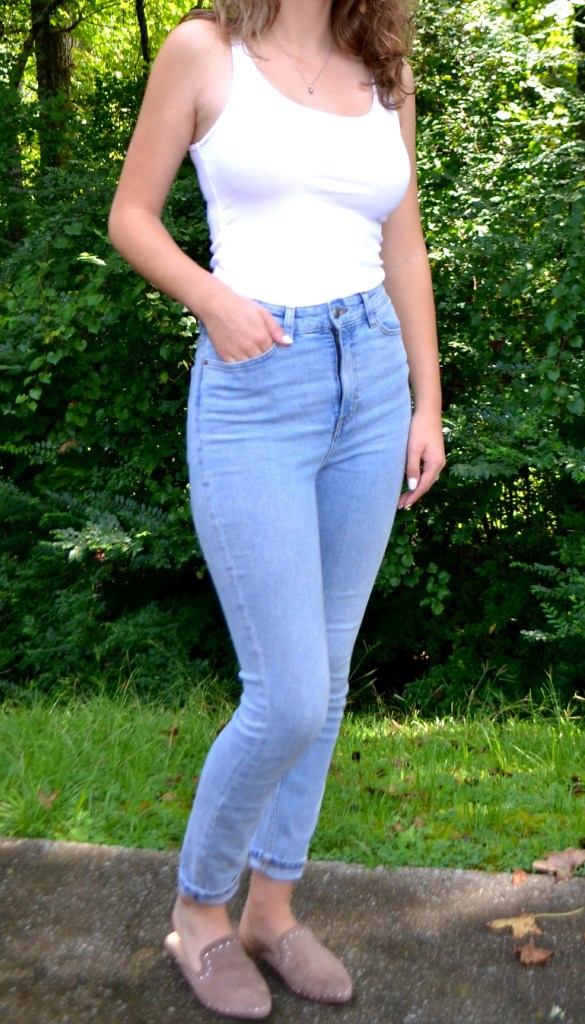
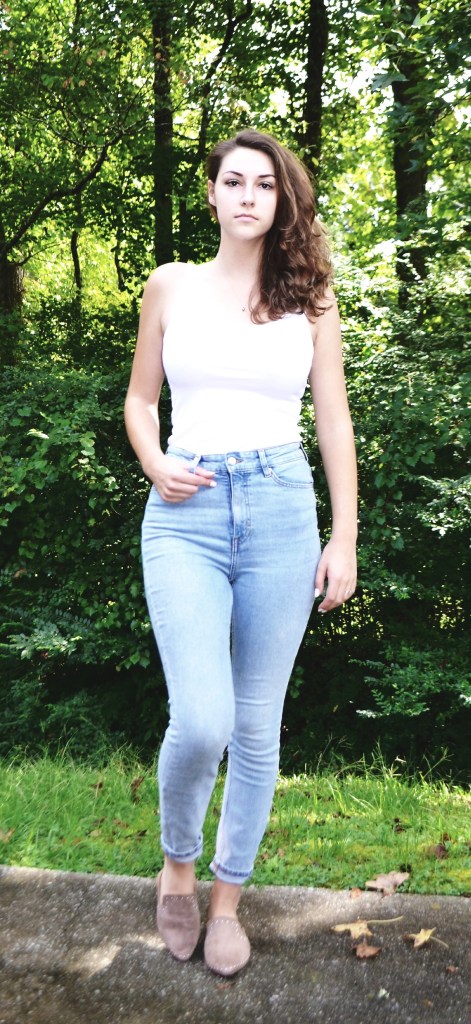
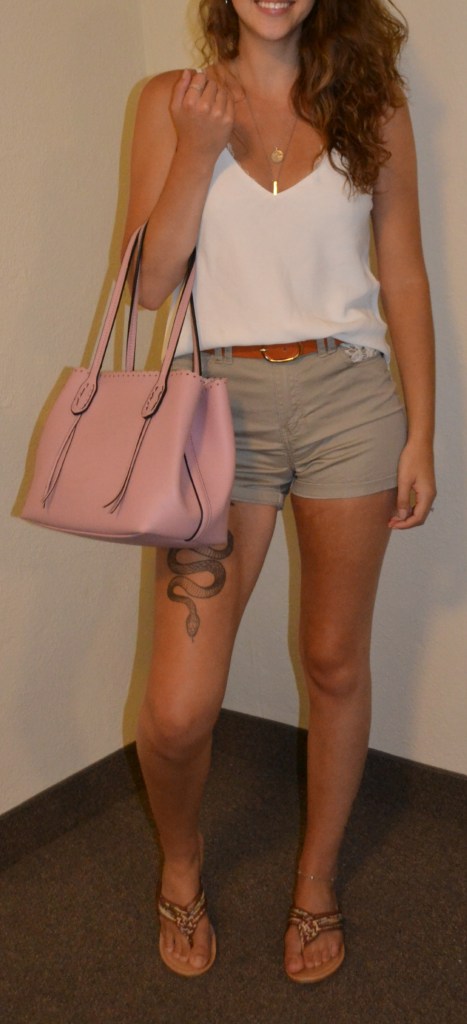
I chose this image because I think it is a really easy outfit to recreate. There are only 2 basic elements in this image; the white tank top and the light wash denim jeans. I could have pulled different themes from this than what I chose to create but I think almost anyone and everyone owns a basic white tank and some light wash denim (and if you don’t, you should, they are basics!). I paired a very dainty pendant with this outfit and some slide on loafers. I could’ve added a bag and glasses like the image but I wanted to keep things extremely simple.

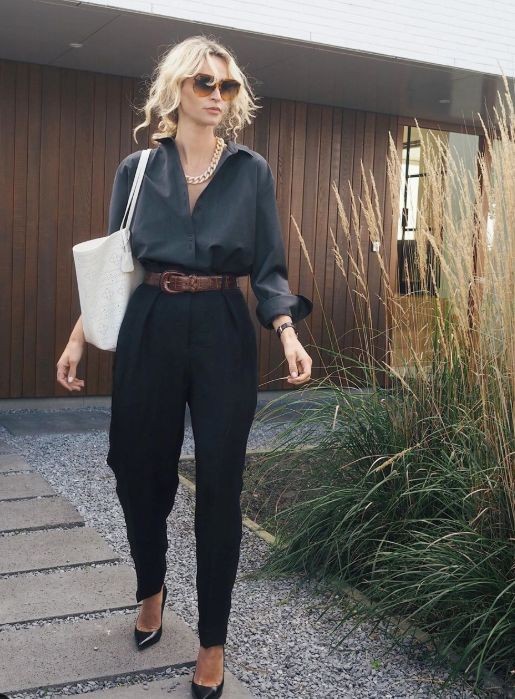
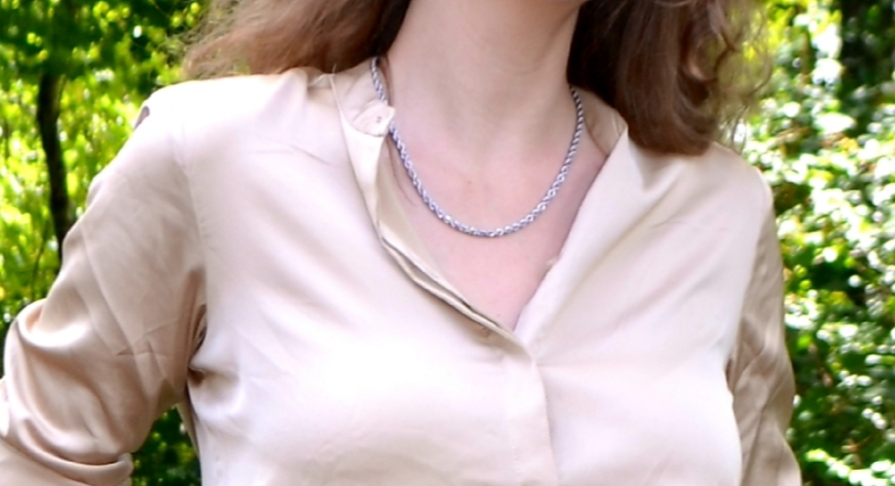
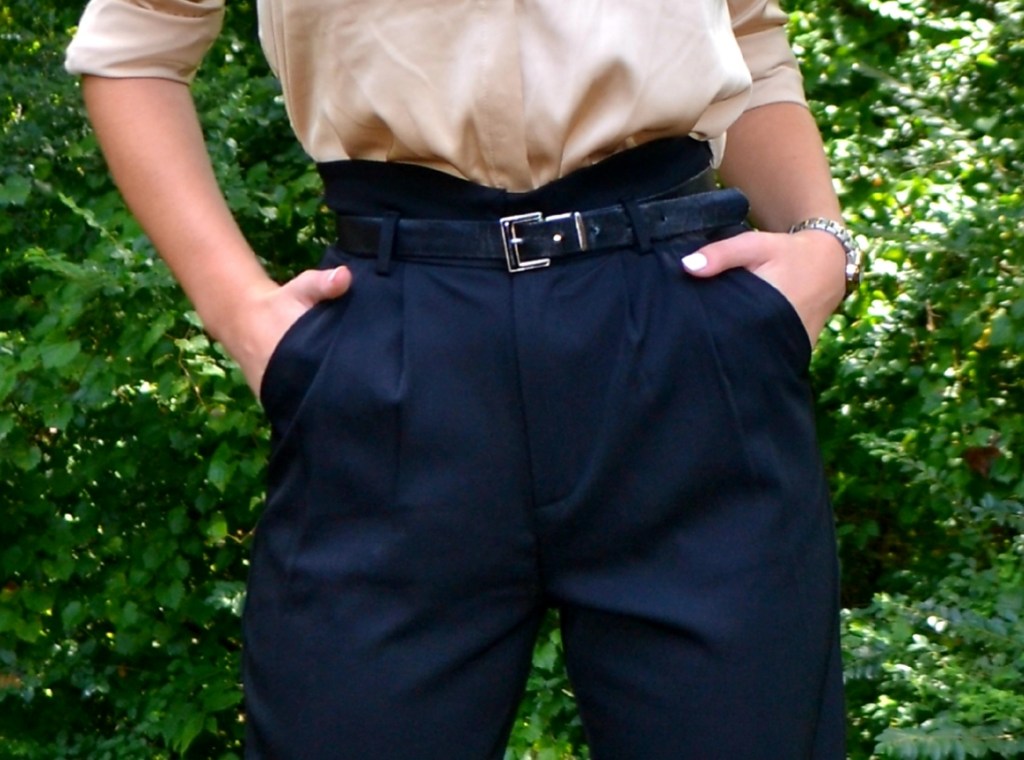
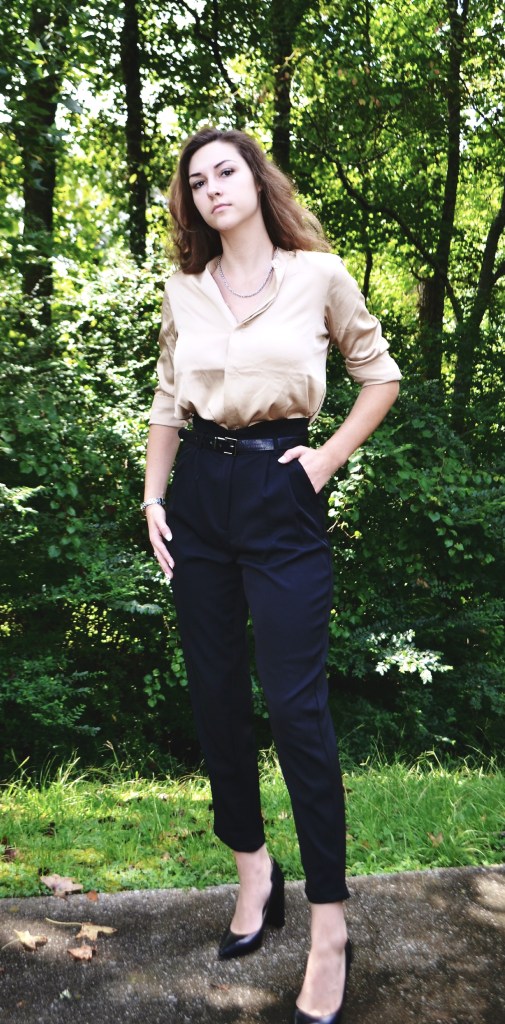
For this outfit I played off of the textures and structures of the inspiration image. I chose to wear a relaxed, silk shirt. I don’t own one in the beautiful green color that you see above, so I opted for a similar style cream button up. In contrast to the relaxed flowy shirt, she has on some more structured trousers. I mimicked this, this time also playing off of the same color as the image. I decided to wear a thin black belt instead of trying to recreate the croc embossed, thick belt from the image. The black blends more seamlessly, creating one long line from waist to feet where I have on a pair of pointed toe, chunky heels. I made this choice with the belt because of the contrasting color in my choice of shirt. In the inspiration image, she has chosen a dark shade for her shirt and bottoms, creating the appearance of height and elongation. Adding the belt for her does not disrupt this line. Because I have a contrasting color on top, adding a different color belt would end up making me look shorter regardless of the high waisted pants and pointed toe heels which give the illusion of longer legs. I added a chunky chain and watch to accessorize, just like in the inspiration image.

If you are interested in finding out more about how you can create your own outfits using items you already own, leave a comment down below!

https://www.instagram.com/budgetbuysandbeauty/

Tips for Cost Effective Beauty Care

I’ve been searching lately for the most time effective, budget friendly and generally accessible beauty care techniques.

Lashes

While I was never one to spend hours on my hair and makeup each morning, applying makeup before leaving for the day did take up the majority of time in my personal morning routine. Not to mention, the inconvenience of then having to remove that makeup before bed at night and reapply the next morning. I’ve tried magnetic lashes that came with the promise of ease of application and removal. The problem for me was that I had to apply a thick layer of eyeliner for the lash to stick to. With this, I was never able to achieve a natural makeup look. I have gotten the very expensive semi-permanent eyelashes done (sometimes costing upwards of $200 depending on your fill) and I loved the look of them, how long they lasted and how effortless they made getting ready each morning, but ultimately I couldn’t justify spending that much money each month (or every three weeks) on refills. Similarly, I have also attempted to do these semi-permanent lashes on myself and I just don’t have the skill.

Finally, this leads me to what really does work for me. In my opinion, this is the most budget friendly, natural looking and time effective move you could make for your lashes. I purchase lash clusters off of Amazon for a little over $10. The tray of clusters that I get provides me with enough lashes for 6 sets (that includes both eyes). For those of you who are unfamiliar with lash brands such as Lashify and Flutter Habit, essentially they make clusters of lashes and adhesives. You can construct your own personal set of lashes by mixing and matching different lengths and thicknesses to achieve the lash look that you desire. It is an at home kit and application that, depending on your lash prep and ability to place the lashes properly, will last for about 7-10 days of wear. I don’t subscribe to either of the above brands. Lashify is expensive, starting off at $145 for just the control kit which includes the applicator tool (which alone is sold for $65), 2 sets of lashes (in styles which you can select before ordering online) and some different glues. The cost of lashes per set is $20 depending on the style I do order the glues from Lashify which are around $25 depending on what adhesive you choose to work with. “Whisper Light” is what is recommended for beginners and that is the adhesive that I chose to start with as well.

So, I use the Amazon clusters that I order for around $10 with the $25 Lashify Whisper Light adhesive. This method ends up being a fraction of the cost of using full Lashify products.

Brows

Everyone has that one one makeup item that they simply will not leave the house without applying. For me, its my brow pencil. I should say was my brow pencil. To me, brows frame the face, so having well kept eyebrows makes a world of difference on your overall appearance. I had been filling in my brows each morning, which really doesn’t take that much time, but I noticed myself getting sloppy and lazy when I was tired after just waking up in the morning. I had heard about eyebrow tinting and a friend had mentioned eyebrow henna to me. All I could envision was having bright orange oompa loompa-looking eyebrows at the thought of eyebrow henna. Nonetheless, I tried it anyway. I ordered some off of Amazon for $12 that had some great reviews (with pictures of non-orange eyebrows) and decided to give it a go. It took me three applications to get the shade of brow tint that I desired with each application being left on for 10-15 minutes (or until the henna had dried). I love it! It looks incredible, I don’t ever have to use a brow pencil EVERY morning and it is waterproof! These henna brows last for about 2 weeks before the next application is needed.

The process is simple. The pack I ordered came with several little packs of henna inside the box. One pack of henna can do around 8 separate brows. Meaning one brow, even after applying 3 different times, only used up one of those 8. You use the little spoon that comes in the box and shovel out half a spoon of henna powder. You add in 8 drops of water and then mix until all the little lumps are gone and you have a smooth consistency throughout. I apply the tint after plucking and waxing my eyebrows to ensure that I am applying in the shape that I want. I also make sure that my eyebrows are free of any makeup and dead skin before application. I wash my face with a facial cleanser and spoolie and dry my brows. I then use a very thin angled makeup brush, dab the henna onto it and apply it to my brows, using a Q-tip to wipe away any mistakes before it dries. Once I have waited 15 minutes, I use a wet cotton pad to wipe off the layer of henna and repeat until I get the desired strength of tint!

Nails

Getting your nails done at a nail salon can be extremely therapeutic for some people. For me, while I like going to get my nails done, it is difficult to justify the amount that I would spend on a simple mani/pedi. A typical gel manicure usually costs between $35 and $80 and you can expect to spend similarly on a gel pedicure as well. I have recently started doing my own gel nails from the comfort of my own home. I purchased a pack of 6 gel polishes (I opted for the Gellen brand which they often use in nail salons) for $14 on Amazon. The foundation and top coat pack that I purchased was $9 and it included a base coat, shiny top coat and matte top coat. I purchased the lamp from Amazon as well for only $18. And Finally I purchased the polish remover for $8.75. I got all of the stuff that I need for around $50 USD which is less than what you would spend on having your hands and feet done just once in a nail salon!

This process however, may be the most involved yet. It typically takes me around an hour if I am just painting my nails, but if I have to remove the prior polish, I spend about an hour and a half. I begin by cutting and shaping my nail with a nail file (if I am beginning with bare nails). I also make sure to run over the surface of my nail with a nail file — my goal though, instead of smoothing it, is to create a rough surface which will help the polish adhere to my nail. Next, I rinse off any debris that was caused from filing, dry my hands and apply Vaseline on the cuticles and let that sit for about 5 minutes. You can use a special nail tool to push back your cuticles but I honestly just use my thumb nail and I press all of my cuticles back then use a cuticle cutter and remove all of my cuticle skin leaving just a clear nailbed. You’ll want to use rubbing alcohol to remove any oils (especially the Vaseline) from the nail, leaving a dry and clean nail to paint onto.

Let the painting begin! Start with your base coat, only paint a very light layer, you will want to make sure that all of your layers are thin so that they cure properly under the light. Once my hand is complete, I pop it under the light for 60 seconds. I do 60 seconds between coats, some people only do 30. I then move on to apply between 2 and 3 layers of whatever color I am working with, again, curing between coats. Something you will notice about gel polish is that it is extremely easy to work with because it doesn’t dry until it is cured under the light. This makes retouching extremely easy. On this note, for each layer you do you want to make sure that A: you are covering the nail but making sure not to touch the skin around the nail. If this happens by accident, clean it up right away before curing. If you end up curing part of the polish to your skin, your polish is likely to peel and it won’t last as long. And B: with each coat, cap the end of the nail by painting the very tip of the nail with the smallest amount of polish on the brush. This too will ensure longer lasting wear with minimal to no chipping. Finally, once all of your color coats are complete and cured, apply the top coat and cure under the light for 90 seconds (I cure mine for 2 minutes 15 seconds which is probable overkill).

To remove…

To remove a manicure or pedicure that I have been wearing for a while I cut cotton pads into quarters just large enough to cover each nail. I then cut sections of aluminum foil large enough to wrap around each individual finger. I wet the section of cotton pad with the soak off remover, place it on top of my nail, wrap a piece of foil around and let it sit for about 10 minutes. This uses less of the soak off solution than pouring the solution into a bowl and leaving your nails in there to soak the polish off. After that, I push all of the nail polish off using my thumb nail (but again, you can use a nail tool for this step). The old nail polish should be dry and flaky at this point and should fall off quite easily. Any stubborn polish that isn’t coming off can be filed with a regular nail file once your nail is dry. Once I have finished using this solution I always wash my hands with soap and water. Since it is a harsh chemical, I don’t like leaving it on my nails or skin for more time than I have to.

Shein Basics Haul Breakdown

Recently I ordered 10 different tops from Shein and limited myself to only selecting items that were in the colors black or white. My goal was to try to replenish some of my wardrobe basics, but there was a twist. I wanted to purchase what are called “elevated basics”. What this means is this: take for example a basic black tee shirt. There is nothing extraordinary about it, it is plain and undetailed. An elevated basic turns the basic up a notch. The basic remains but some extra pizazz is added in. The once regular black, tee shirt now has ruffled shoulders, lace trim around the neckline or a cutout near the collarbone. The essence remains, it can still be worn with just about any other clothing item, but there is more visual interest that has been added into the mix.

In this article, I will elaborate on the items I have purchased describing why I added them to my cart and what drew me to them. While I have titled this article “Shein Basics” I would like to note that many of the items I am featuring here are not from their Basics line.

Scoop Neck Ruffle Cuff Tee

First thing to note, the regular price of this shirt is $8 and I purchased it for $7.03 with a coupon. It only comes in the color black. The features of this shirt that drew me to it were the deep scoop neck and the feminine ruffled shoulders. Typically I wear V-neck cut tops because that cut is the most flattering for my body type. The reason being, I have very broad shoulders (which is typically seen as being a masculine trait) and I have a larger bust. If I were to wear a higher necked top, that would create the illusion of an even larger chest. By wear a V-neckline or scoop neck, this provides the illusion of proportion and visual relief (with the negative space being one’s skin). I usually stay away from items that have detailing in the shoulder area as embellishments draw the eye to that area, but the ruffle detailing seems very relaxed and feminine which I think will counter balance my structured shoulders nicely.

Solid V Neck Blouse

The regular price of this shirt is $10 and I purchased it for $4.83 on sale and with a coupon applied. It is offered in the colors black and green (and the green color is stunning). I was drawn to this shirt first because of the deep V-neckline. I also thought the detailing on the shoulders was very feminine with the almost crochet-looking lace. I think this shirt would pair well with a relaxed pair of dark jeans or could be dressed up for office work with a high waisted pencil skirt and a blazer if desired. I am looking forward to the versatility of this shirt occasion-wise. Another aspect that I recognized was the flowy and breathable looking fabric. Not only do I think this is extremely important for summer, but I often end up tucking my shirts in to provide more visual interest and shape to my body. Tucking in is done much easier with a fabric that falls nicely and is thin enough so it doesn’t create a line or bulge underneath whatever it is tucked into.

SHEIN BASICS Solid Cami Top

The regular price of this top is $7 and I purchased it for $6.16 with a coupon applied. This shirt comes in too many colors to list them, but they do carry this shirt in all of the basic colors and then some! I purchased this shirt because I originally got it in white and it is my all time favorite purchase from Shein. I love the flowy material, the V-neck, the adjustable straps and the overall way that it clings to the curves of the body while remaining breathable. I look forward to layering this shirt with a leather jacket, a blazer or a soft cardigan. One thing to note is that I don’t typically gravitate toward spaghetti straps but I often wear my white tank in this style with a lacey bralette underneath. The lace peaks out along the neckline and the undergarment adds to the outfit intentionally. I ordered the very same bralette in a black to pair with this shirt and various other tops that I have added to my wardrobe.

Lace Panel Dobby Mesh Sleeve Blouse

This shirt is regularly priced at $10 and I purchased it for $8.69 with a coupon applied. It is available in both black and white. There were a few things beyond just the V-neck and the flowy material that attracted me to this shirt. I love subtly sexy details and I think that mesh, when placed properly, can do a really great job of adding a touch of sexiness to a garment. Because the mesh is placed on the shoulders, I again think that this detail will soften my broad shoulders. I also love how the delicate lace along the neckline provides a slight bit of extra coverage because it looks like it is fairly low cut. One other final thing that I observed with this shirt was how it would successfully hide any bra straps. I prefer to never have my bra straps showing, but with some clothing items it is near impossible. I never feel comfortable wearing a strapless bra. Between the lace, mesh and the fabric of the shirt that continues along where the straps would lay, I think that by either wearing a black or nude bra, straps will go unnoticed.

Guipure Lace Trim Mesh Insert Tie Back Tank Top

This tank top is originally priced at $11 and I purchased it for $4.02 on sale and with a coupon applied. It is only available in the color black. With this shirt, I will be noting many of the same features that I mentioned above about previous garments. I was drawn to the V-neckline with the lace detail, the subtle mesh on the shoulders, the chunky straps that are likely to hide bra straps and the thin, flowy material. Additionally, the back of this top is a tie back that I think will tie high enough up that it won’t end up showing a bra in the back. I think this is such a sweet addition to an otherwise basic tank top.

Lace Trim Swiss Dot Cami Top

The tank top above is regularly priced at $14 and I purchased it for $5.70 on sale and with a coupon applied. It comes in black, white, pink and dusty blue (the dusty blue is such a sweet summer color). I love this elevated tank top for its unique dot-textured fabric and its lace embroidered V-neckline. I also like how the lace embellished spaghetti straps provide more coverage to hide bra straps underneath. I think it would be easy to get away with wearing a nude bra without any straps showing.

Solid Contrast Lace Butterfly Sleeve Blouse

This blouse is $14 at full price, I purchased it for $5.70 on sale and with a coupon applied. It is only offered in the color white that you see above. I was initially drawn to this piece due, of course, to the V-neck and the color. I love the lace detaining along the neckline and down the center of the shirt. The shoulders are ruffled, providing a feminine contrast to my broad shoulders. The material of this shirt looks light and flowy, therefore easy to tuck in and a great choice for summer. Thin material also makes garments great for layering in the cooler seasons. I’m thinking that this tee shirt will be great paired with a casual skirt or jeans for a backyard barbecue occasion or dressed up with trousers and heels for work at the office.

SHEIN Lace Insert Swiss Dot Chiffon Top

This shirt is regularly priced at $8 and I purchased it for $5.28 on sale and with a coupon applied. White is the only color that is offered in this style. I love the thicker straps on this shirt which will cover bra straps effortlessly. Something to be aware of is that the back of this shirt is see-through and therefore, you will have to choose your undergarments accordingly. I plan on wearing a white, lacey bralette with a thick lacey band in the back so that it looks as though it is an intentional part of the outfit.

SHEIN V-neck Lace Trim Top

This tee shirt is originally priced at $7 and I purchased it for $4.40 on sale and with a coupon applied. It is only offered in the color white. I love the very darling style of this shirt with the scalloped lace and the semi puffed sleeves from the pleating on the shoulders. Ever since the show Bridgerton was released, the fashion industry blew up with Bridgerton inspired clothing. The way that this essence has been most consistently echoed through the trends is in the form of puff sleeves.

Solid Lace Panel Cami Top

The regular price of this tank is $7, I purchased it for $6.16 with a coupon applied. The only color this is available in is white. This tank top is very similar to the first white item that I mentioned except this one does not have the dot texture throughout the bodice. The lace along the straps provides coverage for bra straps and elevates the otherwise basic white tank top. The material is thin and flowy and can be easily tucked into a pair of bottoms. This is another very versatile shirt as it is an elevated basic, and can be work for just about any occasion dependent on what it is paired with.

If you found this breakdown interesting, be sure to check out my Shein Basics Haul review where I will include pictures of the items I receive and provide my opinion on each elevated basic top!

Diverging from Denim Shorts – “The Shorts Dilemma”

Every summer I default to wearing classic denim shorts with EVERY one of my summer outfits. While there is absolutely nothing wrong with a good pair of blue denim shorts, wearing a pair of these with every outfit provides your wardrobe and overall look with little versatility and visual interest. So what else is there to wear instead? We know we want function, pleasing appearance and something that is going to help us remain cool in the summer heat. Below are some options to help you cycle through your bottoms and help you prolong the existence of your favorite pair of jean shorts.

Shorts

Shorts can come in a variety of fabrics and materials that can meet the criteria for just about any occasion. Below are some visual examples of shorts that are not likely to break the budget but will certainly knock your style out of the park. All images are from the website Shein and each pair of shorts is under $15!

Shorts are fantastic for if you want minimal fabric during that hot weather. They also provide you with easy wear and mindless coverage that you don’t have to pay much mind to. Shorts can be used as casual wear or dressed up to create a formal and fancy appearance. I reach for shorts for these very reasons. When I am on the go or performing tasks that may not be suited for a dress or skirt, I reach for a classic pair of shorts.

Summer Pants and Capris

Following along the lines of easy to wear bottoms, summer pants are another great and luxurious looking option that provide the coverage that you may be seeking when resorting to your denim shorts. Summer pants elevate just about any look by either providing a casual yet put together look, or a formal and feminine one. All images are from the website Shein and each pair of pants is under $25!

Pants are great because though they have more fabric than shorts, they often keep you just as cool if you find the right style and fabric. Look for loose fitting pants that end around you ankles in length. Accentuating the ankle (the smallest part of your leg) is a very flattering and sexy look for any woman’s body type. You can find different styles of pants that do this as well as you see in the references above.

Skirts

Skirts come in any length and plenty of different fabric types. You can find skirts that are bedazzled and full of detail or simple and minimal. There is a skirt for almost every occasion. In the summer I prefer to wear skirts that fall down past my knee (or right above), or skirts that have a heavier material if they cut off above my knee. The wind can be your worst enemy when wearing a skirt and I try to premeditatively avoid all possible wardrobe mishaps before they happen. That being said, A long skirt is not likely to blow up in the wind and show off your goodies, similarly with a heavier, more structured fabric. Something to be mindful of is that heavier fabrics are often less breathable and won’t make you feel as cool when worn in the hot summer weather. All images are from the website Shein and each skirt is under $20!

In comparison to dresses, skirts are separates and can be paired with many other items. If considering a dress or a skirt, my advice would be to choose the skirt because more outfits will be made from that than a dress. A functional wardrobe is created from (mostly) basics and separates!

Skorts

Skorts are something that you likely wore a lot as a young child and they most certainly are “still a thing”! Cute skorts can be found almost anywhere, but as above, I have linked options from Shein to give you a few ideas. The skort combines the cute, girliness of a skirt while maintaining the coverage of shorts — hence, “skort”. All images are from the website Shein and each skort is under $15!

Dresses

Dresses, much like skirts, are easy and breathable pieces of clothing to wear. The ease of wearing a dress comes with not having to plan your outfit, the outfit is already created. Of course, add your jewelry, handbag and shoes but you don’t have to pay any mind to mixing and matching fabrics if you don’t want to. I often wear dresses when I want an outfit that I know will look chic and put together even if I have no time at all to get ready. All images are from the website Shein and each dress is under $25!

Rompers and Jumpsuits

Rompers and jumpsuits are similar to dresses in that they are a preassembled outfit that you don’t have to put any effort into. You can add a cardigan, belt or cute bandeau to add an extra something, but they also look cute and put together all on their own! Generally, my rule when looking for rompers is to find something that is either more covered on the bottom and less covered on the top (or vice versa). This will prevent you from feeling like you are showing too much skin but of course, always wear what makes you feel comfortable and beautiful!

Making Successful Online Purchases

Online shopping is so convenient, now more than ever! An endless world of fashion and lifestyle items literally right at your fingertips. With the click of the mouse, they magically arrive at your doorstep (in a few days). But why are people so often put off by the thought of purchasing clothing online?

There is a lot of thought and preparation that goes into a successful online purchase of clothing. A lot of thought. To make your life a little easier and your online shopping experience a little more successful, below I have outlined six considerations (in no particular order) to be mindful of before making an online purchase.

Be sure to check sizing…
Always check the sizing guide. No matter what website you are shopping on, always take the time to check the sizing guide. Unfortunately, there is no standard measurement of what a size 4 is versus a size 7. In one brand you may very well be a size 4 but when you order that size 4 online and receive what you would otherwise believe is a size zero, you will be greatly disappointed. Save yourself the energy by checking the size guide ahead of time. Most sizing guides will also tell you how to measure yourself for each measurement. If you don’t already have one, look into getting a handy tape measure so you can always accurately check out the sizing guide.

Read the reviews…
While this step can be time consuming, always read the reviews prior to making a purchase. This is where I gain the most information about the product under consideration. Some things to keep your eyes peeled for in the review section are:

  1. Sizing – most people will make note of if the product was drastically inaccurate when it comes to sizing.
  2. Quality – this is something that people will note most often about the fabric and stitching but they won’t always communicate what part of the item they find to be of particular good/bad quality.
  3. Authenticity – some items are not received as they were advertised. This is where picture reviews come in handy. Some people will complain just to complain, but if there are images that you can take a look at yourself, you can make the call of if you think the product was correctly/incorrectly advertised and choose to or not to make the purchase.
  4. Other – other aspects may be noted about the product such as if the fabric is see-through, if it easily wrinkled, if it held up in the wash, etc.

Compare sites and similar products…
Its okay to shop around! Look at different websites for products similar to what you are searching for and have in mind. See if you can find the product for less money on a certain website. There is no shame in looking for dupes or knock-offs of high end clothing or footwear. If you aren’t concerned with brand names, this is a much more affordable way to obtain your desired style without the massive price tag. Don’t limit yourself to one site alone!

Opt for free shipping or reduced shipping costs…
Before checking out, always see if the company offers a deal on shipping. Check to see if there is a free shipping deal going on, these specials usually happen around holidays or company anniversaries on most websites. Sometimes free shipping is advertised no matter what amount you are spending on the merchandise, other times you may only qualify for free shipping if you spend a certain limit. In this case, see if the limit fits within you allotted budget. If not, perhaps hold off on your purchase by waiting a month or two to combine your shopping budgets to meet that shipping requirement. However, meeting the shipping requirement sometimes promotes impulse buys (which is exactly what the company is hoping you will do). Make sure that the items you are adding you your cart are also adding value to your wardrobe rather than just taking up space.

Secure online shopping…
Another aspect to consider when online shopping is the security of your information. Some sites will allow you to enter in your credit card information and “purchase” your items with no intention of sending the items to you at all. Some sites are more malignant in their intentions and will not only withdraw the amount of your purchase, but will access your credit card information and drain your funds. This is a fear that often limits people to purchasing items from well known companies and defaulting to Amazon. I love Amazon but why limit yourself to just one website?

Many lesser-known websites will advertise on social media such as Facebook and Instagram. They will show beautiful clothing items with a desirable price tag. But how do you know if you can trust the website with your valuable credit card information? Below is a list of a few precautions you can take prior to making any purchases on these websites:

  1. Purchase a prepaid Visa card – Prepaid Visa cards or credit cards can be used just like any old, regular credit card you might own. These cards however, are not tied to your bank account and the money you upload onto them is the only amount that can be accessed from them. If you are unsure about the validity of a website, resorting to the use of a prepaid Visa card may be a good way to test out a small purchase without risking your entire life savings.
  2. Research the website – Googling if the website is a scam or not will often bring up reviews of the website. This is a good way to gage whether or not people frequently purchase from the website and if they have had positive or negative experiences with them in the past. These reviews will often also cover not only the authenticity of the website/company, but the customer service, expected delivery wait times and the reviews of products themselves.
  3. Watch YouTube reviews – Along the lines of the second precaution, watch YouTube reviews of the website. Often times YouTubers will do haul reviews from websites and rate the products they receive. If you are a more visual decision maker, this may be a good route to go.

Some of my favorite online stores to shop…
So where are some of my own favorite online stores to shop? Below is a list of the regulars that I return to time and time again:

Amazon – This had to be at the top of my list because they provide a fuss-free and reliable shopping experience nearly every time. Amazon has amazing customer service, usually short delivery wait times and is a trusted online store. They also have some great deals and sales on particular items. Additionally, if you download the coupon app called “Honey”, when shopping on Amazon, it will provide you with purchasing information about the product such as inflation cost, deflation cost and similar products for less or by other distributors.

Etsy – This is my go-to shop for all things jewelry. Sellers will promote sales on their products as they please. You can favorite items and allow notifications on your phone or device to let you know when your favorites go on sale. I have had nothing but fantastic experiences with purchasing items from here (we even got my husband’s wedding band from a seller on Etsy). I also enjoy supporting small businesses when I can and when my budget allows me to do so. Etsy sellers each have their own range of prices depending on the product and materials used, so there really is something on there for everyone! Delivery wait times will be dependent on each seller and where you are located in relation to them. Most often, delivery estimates are entirely based off of the postal service and are completely out of the hands of the sellers. Delivery times for me have ranged from anywhere within a week to just under a month to receive (during the pandemic and around Christmas time waits were longer).

Shein – This is one of those sites where you really have to pay attention to the reviews. I have ordered countless items from Shein and only had one or two that didn’t fit me well or were made out of (what I deemed) poor quality material. Mind you, I spend a lot of time reading through reviews on this website until I feel like I have gained a sufficient idea of the product prior to purchase. Another safe way to purchase from this website is to look at the star rating or the number rating of the product. The star rating is of course based on the rating that paying customers have collectively given it. The number rating is based on if it is a top seller with positive reviews. Both of these will give you a great idea of the product’s authenticity prior to purchase. The site also incentivizes reviews from customers by giving points to its members for each review (more points are given if a photo is included in the review). The only downfall to this site is the long wait time for clothing to arrive. For each purchase I have made, it has taken around a month to arrive at my doorstep (but the estimated arrival time has never been inaccurate). Shein will often have sales and free shipping deals. I have never paid for shipping with Shein, I always make sure to reach the free shipping limit or to wait for when they advertise free shipping without a dollar limit.

JustFab/ShoeDazzle – This site is fantastic for purchasing shoes! The shoes or boots arrive usually within 3 weeks. I have always been pleased with the quality of the boots/shoes that I have ordered. They have been some of my go-to wearable items. JustFab and ShoeDazzle have a deal where you can sign up for their VIP membership and get your first pair of any shoes on the site for only $10! For the VIP membership, in order to avoid the monthly fee, you can either purchase something off of the website within the month, or you can choose to skip the month. You will not be charged the monthly fee so long as either of those things are done before the time is up.

Wish – I debated whether or not to include this site in my list, but here we are. This is another site where reading reviews is key to a successful purchase. I have only ever bought jewelry off of Wish and I have been pleased with all but one item I have received. All the jewelry that I have purchased has remained tarnish free after many uses and wears. I was looking for items that were made out of good quality materials (such as sterling silver, gold or gold plating) and they have held up well thus far. Again, the wait times with Wish are unpredictable, usually taking at least a month or two to be delivered in my experience. Multiple times the estimated delivery was exceeded by several days or even a week. Wish is great for inexpensive purchases that you don’t need to receive any time in the near future. They are not always reliable with authentic products. Reading the reviews and scrolling through customer posted images of the product do make a world of difference in the success you will have with purchasing items from their online store.

Hopefully the above ideas have given you lots to consider in making your next online purchase. Taking all or some of the above steps will aid you in your successful online shopping experience and overall success!

Foundational Pieces: Wardrobe Basics

The foundation of a house is what every other element is built upon. Think of your wardrobe basics in the same way. Each wardrobe basic allows you to build your wardrobe out into a beautiful and functional array of workable outfits.

I hear so many people say how they feel as though they have plenty of clothes but can find so few outfits to wear. This usually means that the essential wardrobe basics are lacking. Basics are neutral items that can be mixed and matched with just about any piece of clothing in your wardrobe. Basics are most often seen in the colors of black, white, grey and khaki — though other colors can function as basics as well. These are classic pieces of clothing that have stood the test of time.

Take the basic white tee for example. This is a piece of clothing has been around forever and has never gone out of style, nor will it ever. A dark blue denim pair of jeans is another basic that each person needs in their wardrobe. While the cut and style of jean may vary as trends come and go, there is no doubt that jeans have always been in style.

This outfit (acquired from my Pinterest inspiration board) is completely made up of basics. She sports a white, V-neck tank top, a beige cardigan, blue washed-out skinny jeans, nude suede peep-toe heels and a relaxed nude leather bag. The accessories she has paired with this outfit, such as her necklace combination and bracelets, are minimal and feminine. Her entire outfit has been constructed from basics that, if removed from the outfit, could effortlessly be paired with any other clothing combination.

Similar to the first, this outfit is made from basics. She wears a relaxed, white button-up blouse, khaki high-waisted trousers, nude lace-up espadrilles and a rich cognac arm bag. Something to note is the patterned scarf she has tied to her bag. This is not considered a basic because of its pattern and therefore, cannot necessarily be paired with any other clothing item/outfit.

This outfit is different from the other two. There are however, basic elements that are incorporated into this outfit that pull everything together and make it work. As you probably can tell, the blouse she is wearing is very beautiful and vibrant but is not considered a basic. This is true for her choice of footwear as well. Her trousers are basics, as is her handbag. Without the basics, this outfit would not be as impactful. Basics allow for the statement pieces, such as her blouse (and arguably her shoes), to be the highlight of the outfit.

Wardrobe Basics Checklist (non- exhaustive)

Black, white and nude tee shirts (neutral tee shirt)
Black, white and nude tank tops (neutral tank top)
White button down shirt
Black, white and nude turtle neck or sweaters
Denim jeans (at least 1 pair of black, 1 pair of white, 1 pair of blue)
Denim jacket
Nude/khaki trench coat/pea coat
Black trench coat/pea coat
Black and khaki trousers/dress pants
Black skirt (usually opt for at or just below the knee for a basic)
Black and nude pointed toe heels
Sneakers
Black flat boots
Black, white, khaki cardigans
Black blazer

If you are interested in learning more about basics and how they can benefit your wardrobe, click the button below to read about my recent Basics haul from Shein’s online clothing store.

Top Tips for Looking Tip-top on a Budget

Money conscious shoppers always abide by some sort of budget when purchasing items for their wardrobe and lifestyle. Sometimes this means putting that item that you adored back onto the rack because its price exceeded your budget of $30. In this post, I would like to share five tips on how to navigate the world of fashion when operating on a tight budget.

Tip #1 – Only Shop Discounts
This tip may seem obvious, but you are bound to get a deal if you keep your eyes peeled for discounts and clearances. Personally, I don’t buy any of my closet items unless they have been discounted. Most times for me, this looks like purchasing used items from a thrift store. The original price that the item had been brand new, is of course, discounted since it has been used. Some items at thrift stores may even still have the tags on them meaning they have likely never been worn and you’re getting a significant discount on a (basically) brand new item!

Tip #2 – Shop Used
I already touched on this tip in #1, but shopping used is a great way to get brand name items for cheap. You would be astounded by how many brand name items you can find by sifting through thrift store bins and racks to find quality items for a fraction of their original cost. The best places to shop for thrifted items are smaller thrift stores. Some of the larger chain thrift stores jack-up their prices because they are better known. My advice is to find smaller thrift stores. These places will often sell shirts as a blanket $2 across the board with no regard to brand names or trending styles. It means working your way through a lot more undesirable items, but if your goal is to find inexpensive attire, these thrift stores are the places to go for unique and inexpensive finds!

Another way to shop used is to make use of places like Facebook Marketplace, eBay, Kijiji and other apps for private sale of goods. Shopping here allows you to negotiate price or even make trades for the desired item.

Tip #3 – Make Use of Online Shopping
Online shopping can be fabulous for so many reasons, one of them being you are more likely to pay less for the items you are purchasing because the company isn’t upcharging for a fancy storefront. Also, many well known brands will sometimes only advertise certain deals on their online websites even if they do own a physical storefront. However, do beware of overpriced shipping and other suspicious costs. Check out my blog on tips for successful online shopping by clicking the button below!

Tip #4 – Consciously Purchase Items
There is a reason why the candy and chips are always placed near the checkout line. Impulse buys are sometimes the purchases that set us over the limit that we had established as our budget at the beginning of our shopping experience. Wardrobe based impulse buys are often the items that look fantastic on the clothing hanger (or maybe even when we try them on ourselves) because they have a gorgeous pattern or unique color, but when we bring them home to our own closets, we find ourselves desperately searching for what on earth we can pair that item with. Don’t make wardrobe based impulse buys! These items end up being pushed to the corner of our closet, still taking up space on a hanger in the hopes of one day being paired with something it “goes with”, when in reality, that pairing never happens and the impulse buy ends up getting donated or thrown away. A way to prevent this from happening is, when you are at the store, ask yourself if there are at least 5 other things in your EXISTING wardrobe that you can easily pair this item with. If the answer is an easy yes, then you’re golden. If the answer is sadly no, then you just saved yourself some money and a psychological headache of not feeling good about your “incohesive and dysfunctional” wardrobe.

Tip #5 – Off Season Buys
Many, if not all, clothing distributors will mark down their clothing items that are going out of season. This helps them sell items quickly to make room for the new season’s collection. If you are a fan of brand name clothing, or prefer to purchase new items rather than used, this method of purchase may be one worth checking out. By purchasing off season items, you acquire brand new clothing without compromising your wallet by paying full price.

When people compliment an aspect of my outfit I love telling them the low price that I purchased the item for. To me, it is a great way to show people that they too can procure a functional wardrobe no matter their place in life or their financial situation.

Looking great means feeling great and ultimately being more productive.

Share these tips to help your neighbors tackle life with confidence!

Design a site like this with WordPress.com
Get started